1 The board
For several exercises it is not possible to use the VxWorks simulator. Either because we need to interact with the outside world (the motor) or because we want to measure the properties of the target system and not of the PC.
The boards we have for teaching are based on Freescale's MPC5200b processor with PowerPC architecture. Some details about the board itself can be found at our HW wiki.
2 Connecting the board
To work with the board you need:
- The board
- Power supply (5 – 24 V)
- USB cable type AB for serial console
- Ethernet connection to university network
To see the board's console, start a serial terminal program (e.g. gtkterm) and set it up for serial port ttyUSB0 and baudrate 115200. You can save this configuration under the name default so that it is loaded automatically when gtkterm starts next time.
3 Booting
There is U-Boot bootloader on the board. After powering the board on, the bootloader starts. After 5 seconds of console inactivity it automatically boots VxWorks. The VxWorks image is loaded from network using TFTP protocol.
After VxWorks is ready to be used, you can see the same prompt as in the simulator.

4 Running your projects on the board
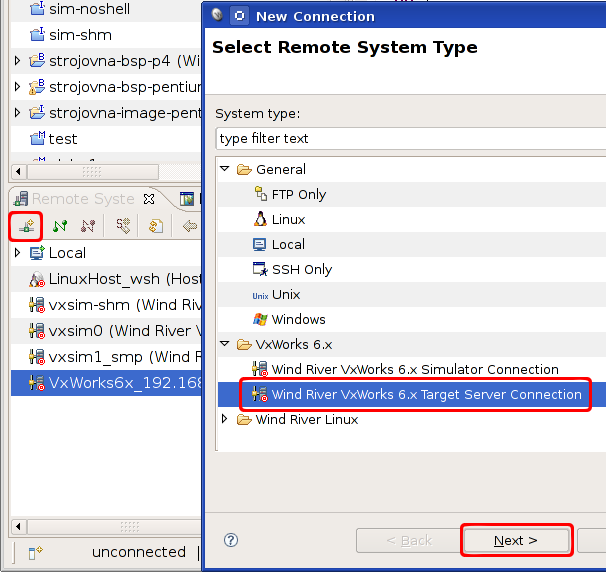
Create a new connection to the target in the WindRiver Workbench. In Remote Systems window click an icon to create a new connection. In the New Connection dialog select Wind River VxWorks 6.x Target Server Connection and press Next.
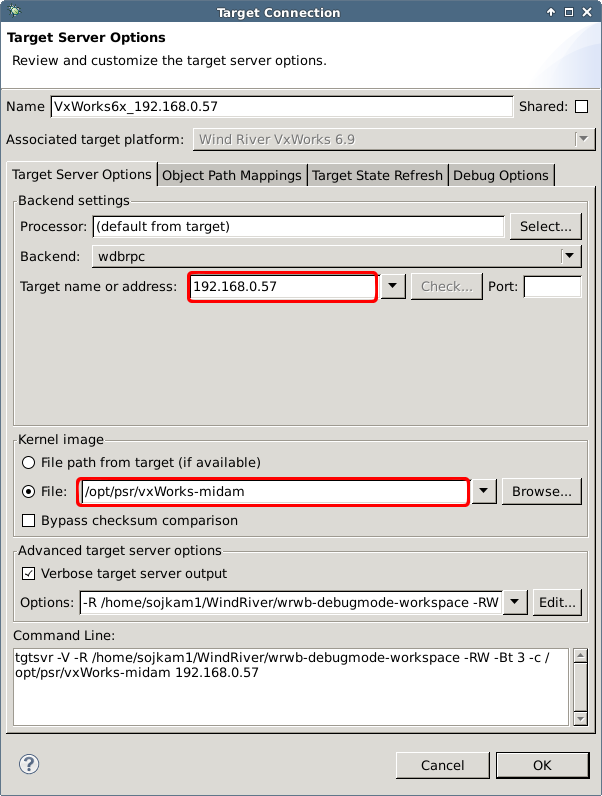
In the next dialog, fill in the IP address of the target computer, specify the Kernel image file /opt/psr/vxWorks-midam and select Finish.
Every computer in lab T2:H-131 has an IP address 192.168.0.xxx. The IP address of the board can be determined from the sticker on the bottom side of every board. You only need to replace 202 with 0, i.e. the board with address 192.168.202.57 on the sticker has IP address 192.168.0.57.
Alternatively, the IP address can be obtained by running ifconfig command typed from the board's console.
Now, the connection is ready. You can use it the same way as you worked with the simulator. The only difference is that instead of closing the simulator, you have to reboot the target machine (by pressing the reset button on the board).
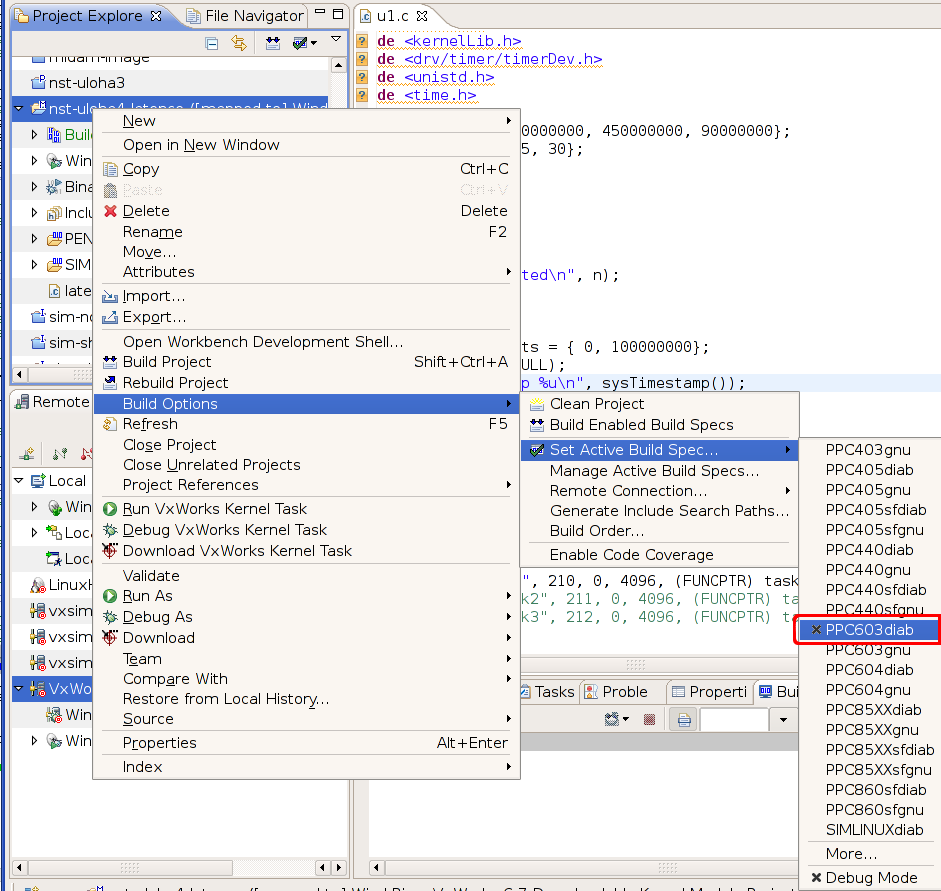
To compile an application for the target DO NOT FORGET to change Active Build Spec to PPC603xxx (for kernel tasks) or to PPC32xxx for real-time processes (xxx stands for the name of the compiler – gnu or diab).
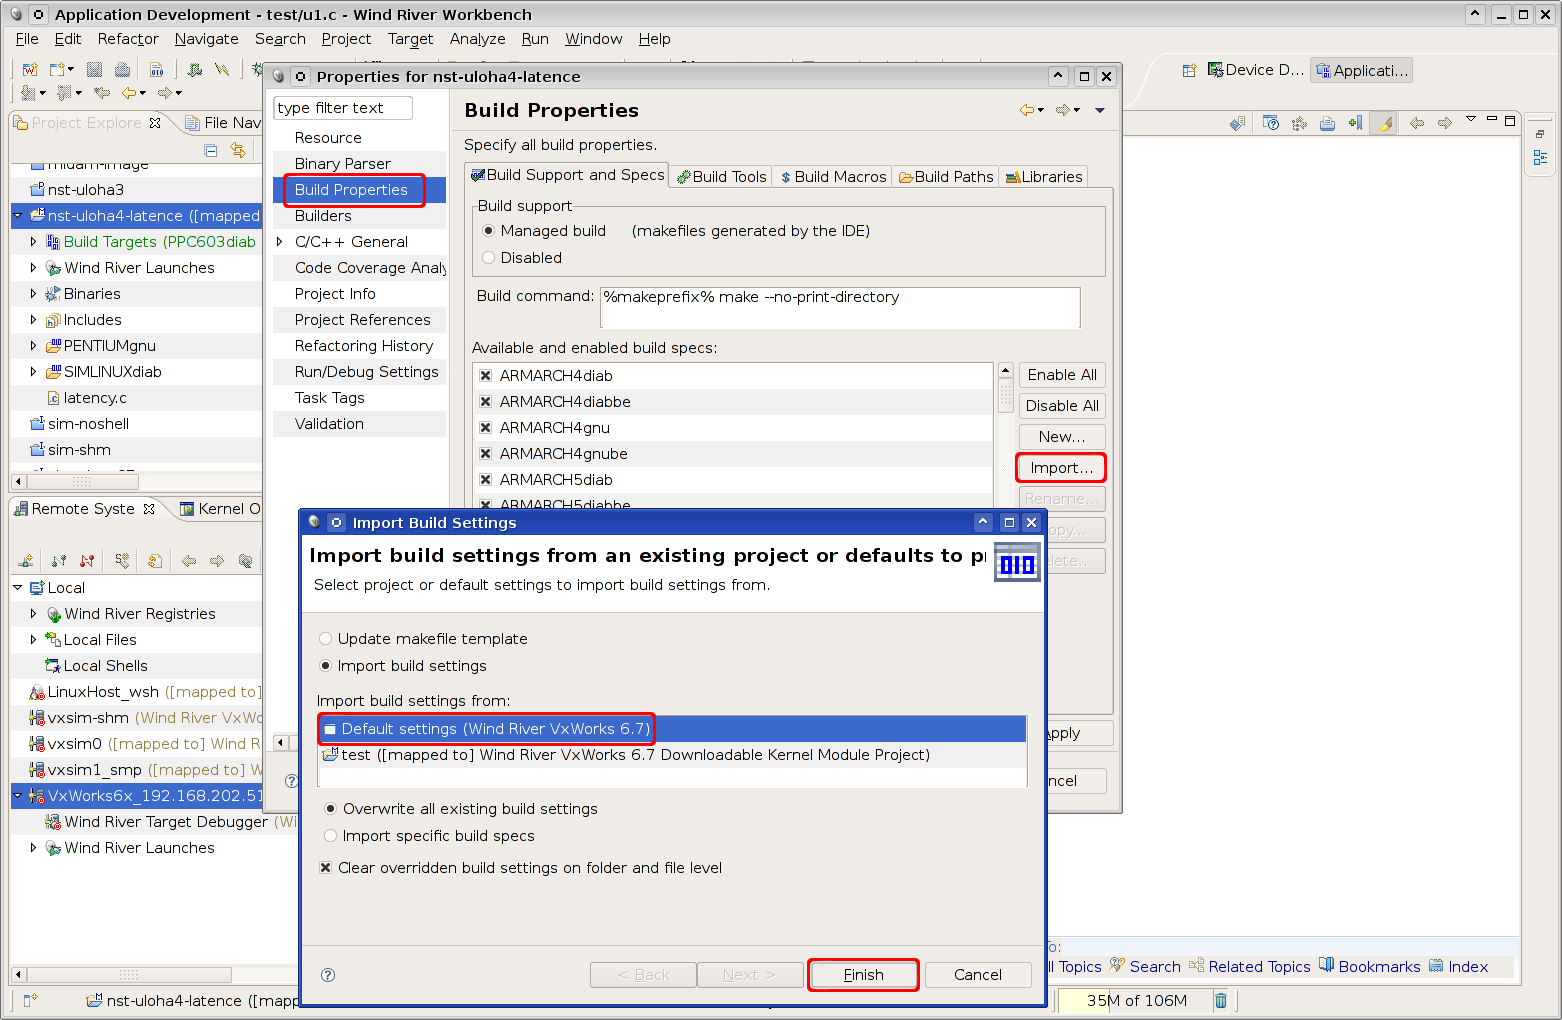
If you cannot see PPC603xxx in the list click More... and select it from the list there. If it is not present even there, right click on the project, select Properties, then Build properties, click Import, select Default settings and click Finish. Now, you should be able to select PPC603 as described above.